3D Laser Triangulation: Bringing Depth to Machine Vision
3D vision is going mainstream – and that’s a good thing. Advances in technology and reduced costs now make 3D vision a technology that can be applied to all sorts of applications and industries, including semiconductor and electronics, EV battery manufacturing, automotive manufacturing, food production, and pharmaceutical packaging. You’ll find 3D sensors and profilers on production floors, in automation, robotic guidance, and quality control.
In the past, 3D systems were too slow to keep up with production, too expensive, too hard to configure, and too difficult to maintain. Instead, system designers have relied on line (1D) and area (2D) scan imaging to perform inspections in a complicated arrangement of cameras and lighting, and extrapolated depth information with software.
Parallel advancements in sensor quality and speed, embedded vision, FPGAs, lasers, optics, and smart systems have made 3D imaging a much more viable option today. 3D imaging technologies now, are low-cost, reliable, repeatable, easy to implement, and proven in a wide variety of demanding applications. And while 1D and 2D are still in wide use, 3D now presents a solid alternative in nearly every instance.
3D Laser Triangulation
One of the 3D imaging technologies making this possible is 3D laser triangulation. The technique has been around for quite some time, but until recent advances, its use for inline applications was curtailed due to the complexity of calibration, limited scan rate, required computing power, and in-field maintenance costs.
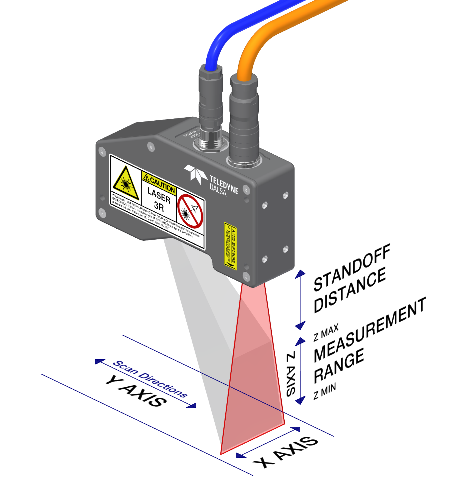
In a typical laser line profiler, a laser stripe is projected on an object and is imaged using a 2D (area/matrix) image sensor. After determining the position of the laser stripe on the image sensor, the profiler gives the information for the lateral (X-axis) and depth (Z-axis) created by the optical triangulation of the laser stripe. The resulting set of XZ pairs along the laser line is called a profile. The distance between two consecutive profiles in the direction of motion constitutes the 3rd axis (Y). By scanning the object in such a way, we obtain a surface scan (X, Y, Z) of the object.
Achieving Performance
With the advancements of high-speed CMOS image sensors and the power of modern FPGAs, fast and reliable embedded systems allow 3D profile sensors to deliver a larger field-of-view (for a given measurement range) and high-dynamic range imaging (HDR) at unprecedented speeds. By incorporating functionalities such as the ability to support diffused and specular configurations, and a high-speed data transmission interface like 5-GigE, 3D profile sensors are better equipped to meet the challenges presented by today’s inline 3D machine vision applications. Offered in a wide range of optical arrangements, these sensors use scalable processing architectures and deliver height and width resolutions down to a few micrometers.
Better Usability and Integration
Integrated laser triangulation profilers are easier to use and set up, and require no special lighting arrangements. By carefully balancing various building blocks of the profiler design (image sensor, laser capabilities, optical path, mechanical and electronics) accurate measurements are obtained at a relatively lower cost.
As the profilers become more reliable and the technology matures, users are likely to be more accepting and willing to choose it as a preferred technology. For example, laser triangulation can be very tolerant of vibrations. By scanning, small vibrations can help to reduce the overall noise created by the speckle of the laser.
Clever architecture design allows you to further increase the power of the system by adding processing blocks, such as artificial intelligence, pixel processing, and smart sensors among others.
System Design for a Wider Field of Applications
Today’s laser profilers combine HDR capabilities and reflection elimination algorithms to measure object features despite varying degrees of surface reflectivity. In addition to the eye-safe red lasers, models are also available in blue laser configurations, suitable for scanning objects with surfaces that are either very reflective or not visible to red lasers.
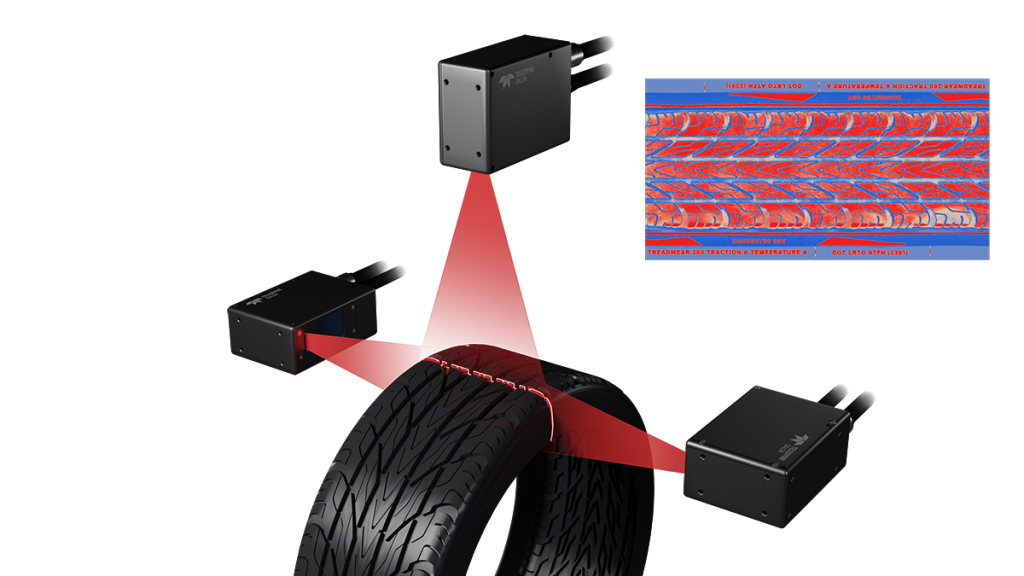
Developments in modern electronics and artificial intelligence (AI) have enabled systems to become even more powerful, and at a reasonable cost. For applications where the field of view of a single 3D profile sensor is insufficient, users can combine several 3D profilers for a synchronized inspection or in cases where objects require 360° inspection.

Examples of such applications include inspection of large panels of wood, metal, drywall, plastic, and extrusions of various types. Extruded parts with asymmetrical features on each side require the use of multiple sensors around the object. This requires that all sensors are configured in such a way that the resulting 3D image is a true representation of the object. This requires that all sensors be precisely synchronized to generate a combined image to ease measurements.

Limitations and Further Considerations
Despite the advancements of 3D laser triangulation in terms of performance, cost, and usability, there are still issues that need to be considered in successful system integration. Because laser triangulation needs to look at angles, occlusions are often a problem. Occlusions are shadows created by the positioning angle of the profiler caused by the geometric triangulation. One solution is to use one or two lasers and multiple cameras. The sensor may also limit the overall speed and performance of the system. Laser speckle is also a challenge, which is the inherent noise generated by the laser itself, reducing the resolution of systems.
Key Markets & Applications
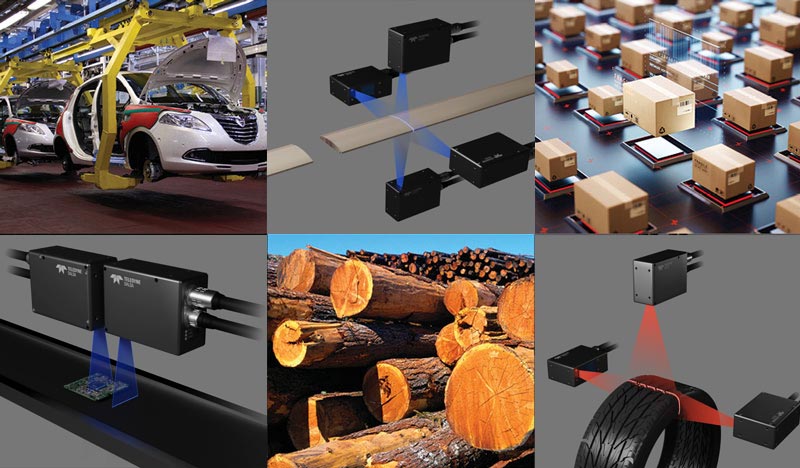
Still, 3D laser triangulation-based systems are suitable for a surprisingly wide variety of applications, including inline height measurement in numerous market segments including electronics and semiconductor production, robotics, automotive manufacturing and factory automation in general.

Industrial
- Inline metrology
- Volumetric measurements
- Robot guidance
- Gap and flush measurements
- Surface inspection
Electronics
- Chip lead inspection
- BGA and micro BGA inspection
- Solder paste inspection
- Bare and Populated PCB inspection
Machine Vision
- Parts inspection
- Part identification
- Embossed OCR
- Embossed barcode
- Bead inspection
- Pick and place
- Wood and lumber inspection
- Angular measurements


 Has 3D finally come of age?
  Scanning Vision Continues to Improve Manufacturing Standards