Bob’s Imaging Fundamentals #8: Machine Vision Techniques Part 1
Thresholding
Also known as segmentation, thresholding is one of the most basic and important techniques used in Machine Vision. The main goal of thresholding is to separate an image into background and foreground.
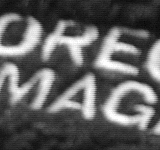
As most of you may already know, an image is made up of pixels, or individual picture-elements. Each pixel has a luminance value (or in the case of colour images, a colour value). Let’s take the following ‘grey-scale’ image as an example:
This image, which has only grey values (i.e. no colour), is 370 pixels wide and 199 pixels (or lines) high. Each pixel is an 8 bit luminance value (also known as a grey value). This means each pixel can take any value from 0 (black) to 255 (white). To apply a threshold to this image, we simply compare each pixel to our chosen grey value (e.g. 200). Then, we will change any pixel below 200 to ‘0’ (black) and any pixel that is equal to or greater than 200 to ‘255’ (white):
So what good is thresholding? Thresholding is usually used to isolate those pixels that make up an object of interest (like the letters on my pullover in the previous example). In the real world we might choose to distinguish the postal code on a piece of mail, or the serial number on a pill bottle. In other cases, we may want to find objects that characterize defects like cracks, chips or blemishes. Using thresholding, we can inspect all kinds of materials like sheet-metal, paper, or any number of materials whose quality must be ascertained.
Blobs
So now we know how to discriminate between foreground and background pixels in order to find the objects of interest by using the thresholding technique. However, once we have made things black and white, we still don’t have objects, only pixels. Sure, white pixels are next to white pixels and black pixels next to black, but that doesn’t tell us anything about what the groupings represent. So how do we go from clusters of similar pixels to actual objects that can be analyzed and described? Good question!
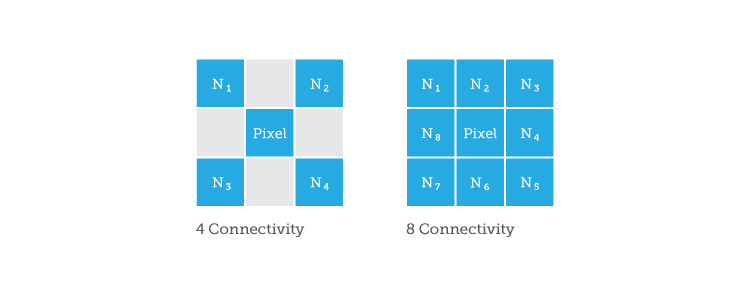
The trick, is to bunch pixels into blobs. Blobs are essentially groups of pixels that are all touching each other. How do you decide who is in the group? By analyzing a pixel’s connectivity and adding connected pixels to a list (one list per group). The two most popular methods of determining if pixels are part of the same group (or blob) are 4-connectivity and 8-connectivity:

These boxes represent an individual pixel (in the middle) and it’s neighbours (N-1 to N-4 and N-1 to N-8). So, if ‘N1’ is white and ‘Pixel’ is white, then they are both part of the same blob. And, if ‘N2’ is the same as ‘Pixel’, it gets added to the list, and so on. In this way, each pixel of the image must be analyzed, such that we end up with lists of pixels that are part of individual groups. To illustrate this, I have coloured the individual groups of white pixels from the image in the thresholding section:
And there you have it! To learn more about blobs, stay tuned for Part 2.
To be continued…
About this article: Bob’s Imaging Fundamentals is an article series based on the work of Bob Howison. Originally titled Bob’s Brain Snacks, these articles were intended to help employees and partners get up to speed with the fundamental concepts of image processing. They became such a popular reference that we’ve decided to bring them to the Possibility Hub. As technology goes further, faster, and new industries discover the power of digital imaging, it’s important to remember the basics.
Bob’s Brain Snacks are recommended for anyone interested in learning about imaging technology. Sharpen your mind and try one!


 Bob’s Imaging Fundamentals #6: Convolution – Machine Vision on the Edge