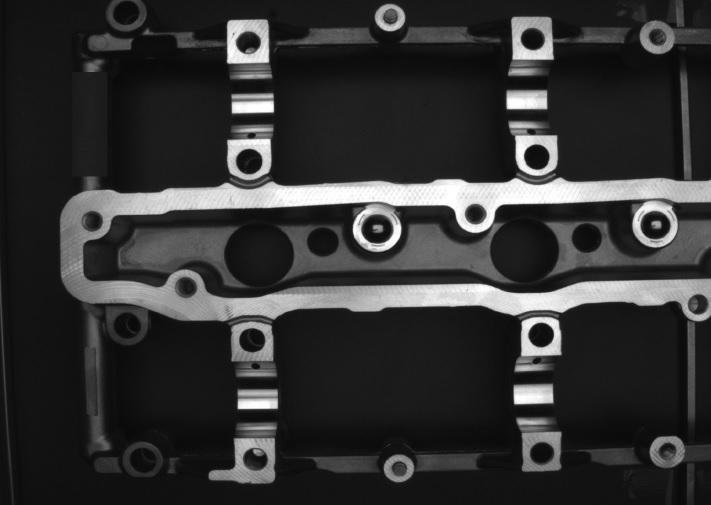
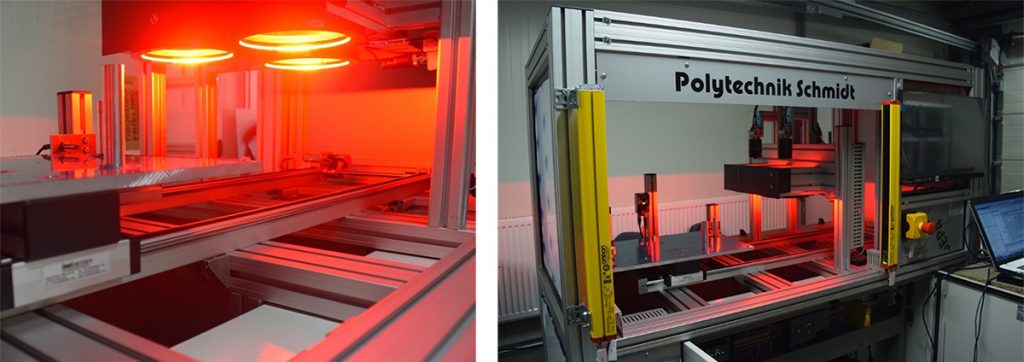
High Performance: Imaging for reliable engine block inspection
Polytechnik Schmidt relies on machine vision systems from Teledyne DALSA to inspect sealing surfaces of cast aluminum engine blocks
The engine represents the heart of every automobile. Performance and fuel consumption depend to a large extent on the quality of the engines used, which is why all parts of the drive system must perfectly correspond to the design specifications. This also applies to the sealing surfaces of engine blocks, as defects negatively affect the tightness of engines reducing both performance and life span.
In the engine production facilities of various German manufacturers, the components supplied to the motor vehicle engine blocks are carefully checked before assembly. “If the automobile manufacturers discover deficiencies, it leads to complaints and associated extra work for the supplier,” says Dietmar Schmidt, founder and Managing Director of Polytechnik Schmidt GmbH. “In the worst case, a car manufacturer can temporarily or completely block suppliers as a result of their supply of defective parts, which would naturally lead to considerable losses in sales for the companies concerned.”
In order to eliminate this risk, a manufacturer of engine block parts in Thuringia, Germany, recently chose to rely on a machine vision system from Polytechnik Schmidt to check the sealing surfaces of the engine parts that were initially manufactured using aluminum casting and then mechanically processed.
Engines made of aluminum
Automotive engine blocks are often made out of cast iron, which is strong and relatively inexpensive. Increasingly, atuo makers, particularly in Europe and Japan, have been moving to aluminum alloy engine blocks. This metal has inherent advantages of lighter weight and better heat transfer. This has made aluminum popular in high-performance racing and sports cars, but is increasingly used as a way to lower the weight of cars to meat governmental efficiency requirements.
Although each common aluminum alloy has different physical properties, they all have a thermal coefficient of expansion that is more than twice that of cast iron. Heat generated by a running engine can affect the internal dimensions of the engine, such as piston-to-cylinder clearances and bearing-to-bore clearances. This requires compensation in design of the block and the thickness of the metal in critical areas depending the temperatures that the block will be exposed to. The engine block will endure the most extreme temperatures and stresses found within a vehicle due to the extreme nature of the combustion process. In an F1 racing car, the gas temperatures within the cylinder can reach 2,600°C
All this means that inspection of aluminum engine parts is very important to ensure that each part meets the necessary tolerances.
Special challenges
Prior to testing, the sealing surfaces of the engine blocks are mechanically processed and then washed and dried. “These steps represent a particular challenge for machine vision because it cannot always be guaranteed that this mechanical processing has been carried out completely and without failures,” explains Schmidt. “In addition, residue from the cleaning fluid can still adhere to the sealing surface after drying. At the same time, every mold is subject to a certain amount of wear and tear over time, which means that the shape of the sealing surfaces being examined can change slightly over time.”
To meet the quality standards of the automobile manufacturers, imperfections such as voids, processing marks and unprocessed areas on the functional surfaces must be reliably detected. Voids up to a diameter of 0.3 mm are permissible for the end customer, but defects with larger dimensions and unmachined sealing surfaces must be identified by the machine vision system with 100% certainty.
Schmidt describes the clear distinction between the adhesion of cleaning fluid and cavities or mechanical damage as problematic, as these appear very similar in the camera image. According to him, another challenge for the system is the precise dimensional assessment of the size of the blowholes, as these were previously only checked by the employees in the final inspection using uncalibrated gauges.
“In addition, our customers want to know if there are scratches on the machined and cleaned sealing surface,” says Schmidt, describing another difficulty. “The software must be able to distinguish these random scratches from the regular machining marks of the mechanical milling of the sealing surfaces in order to avoid too many possible rejects.”

A three-camera solution
Polytechnik Schmidt has met the supplier’s extensive requirements with a machine vision system based on three Genie Nano cameras with 5-megapixel resolution and suitable lenses with 12 mm fixed focal length. The use of three cameras is necessary to be able to show the entire field of view of the test parts without distortion. In the system, the test parts are scanned as they pass below the cameras.
Schmidt also mentions the use of special dome lights as being a very important component for image capture: “The surfaces of the metallic components being inspected are highly reflective. This makes it difficult to detect imperfections and irregularities within the seal and bearing surfaces without using special means. However, through a clever selection of the camera technology and lighting, these flaws are clearly visible, precisely worked out in conjunction with specially adapted filter algorithms and subsequent plausibility considerations and classified according to their size.”
Above all, the assessment of high gloss bearing shells requires the use of special lenses and powerful machine vision software to process the image data because of their special semicircular shape. “When evaluating all recorded images, we use proven Sherlock software from Teledyne DALSA, which runs on a fanless industrial PC and reliably guarantees a highly precise and objective evaluation of the functional surfaces,” emphasizes Schmidt.

Proven partners
Polytechnik Schmidt has been involved in machine vision since it was founded in 2003 and, as a system integrator is active in the automotive industry, steel manufacture, food, packaging, and other areas. Schmidt describes the design of camera systems and the development of imaging for specialized defect detection as core competencies of his company. “We use established machine vision libraries, but also develop our own graphical user interface, for example to make the image analysis provided by Sherlock available to the customer in an even more user-friendly manner. We have created an interface for the entire control system by seamlessly storing recorded image data and software results for each image, which meets our customer’s ongoing quality assurance requirement.”
Polytechnik Schmidt has intensified its cooperation with Teledyne DALSA in recent years, says Schmidt: “We have been expanding our use of Sherlock software since 2010 and now have deep knowledge of the individual tools in this powerful library.” Also, the Canadian manufacturer´s cameras have become more and more important. After initially having used cameras from the Genie and Genie Nano series in a few applications, Schmidt’s company is increasingly relying on Teledyne as a partner for machine vision due to this positive experience.
After detailed preliminary investigations and a comparison of various recording and evaluation options for the system inspecting engine blocks, it quickly became clear that the essential machine vision components were once again ordered from Teledyne DALSA. “In addition to delivering the hardware, Teledyne DALSA also provided us with competent support regarding programming issues and supplied helpful answers to special questions about the integration and control of the cameras,” emphasizes the Managing Director. “With Teledyne DALSA we have found a partner who not only produces a wide range of high-performance area scan and line scan cameras as well as the associated image acquisition and evaluation hardware, but also develops the algorithms for the image evaluation itself. As a result, we get our key components from a single source and can rely on the fact that hardware and software fit together without any problems.”
Even when it comes to questions about implementing the technology in very special applications, Schmidt has had very positive experiences with Teledyne DALSA: “We only have to speak with one company that knows its products very well. The direct connection to the service and development department for the Sherlock software is a very decisive advantage for us over other suppliers, because we depend on offering our customers the best possible, high-quality service — even in difficult cases! Working with a company with worldwide presence, a very good infrastructure and first-class experts in the development department has proven to be very useful. We feel that our ideas and suggestions for product improvement are valued by Teledyne DALSA, which continuously strengthens of our relationship.”
Satisfied customer
The partnership between Polytechnik Schmidt and Teledyne DALSA has again proven itself for the system in Thuringia because the system, which has been in use since the beginning of 2021, enables reliable detection of the individual error types even under difficult conditions such as unclean functional surfaces. In addition, for the purposes of traceability, Polytechnik Schmidt has implemented the option of saving the recorded images and documenting any defects found in a database for quality assurance purposes. “Our customer is very satisfied with the new system,” summarizes Schmidt, who is already planning to use machine vision technology from Teledyne DALSA for the next upcoming projects in various applications.

RIGHT: Patrick Menge, Business Development Manager Europe Vision Systems at Teledyne DALSA in Krailling, Germany


 Enhancing Automotive Parts Inspection with Machine Vision
  Vision system ensures speed and accuracy for automotive industry