Trevista: Detecting Defects and Scrapping Waste
Clever Automated Quality Assurance Solution Delivers 3D Accuracy at 2D Speeds
Detecting the most miniscule details on a test object can determine product quality, affect costs, and even save lives. This is especially true in the automotive industry, where Germany-based Zorn Maschinenbau produces small-to-micro-components for fuel injection pumps. These pumps not only directly affect vehicle performance and efficiency, the defects they monitor for can also create risks to public safety. This makes rigorous inspection, even at high speeds, a necessity.
Manufacturers place strict requirements on the imaging analysis process to avoid what BMW faced a few years ago: a recall of nearly 40,000 vehicles. The models affected included the twin-turbocharged N54 engine, which has an injection system that delivers fuel at much higher pressure than a normally-aspirated engine. In order for this to function properly it required two different types of fuel injection pumps, which were occasionally failing. When this happens there is risk of the engine suddenly stalling or stopping outright, forcing the driver into a potentially dangerous situation.
A Complex Challenge
While it’s important, it isn’t easy. Inspecting such minute objects with varying surface features is an extremely difficult vision challenge. Complex object shapes and textures often limit the effectiveness of conventional two-dimensional optic test methods. Items with an irregular surface or one that reflects light–such as metal automotive parts– make it difficult to reliably and accurately detect defects.
“Depending on the nature of the previous machining operation, test pieces can have vastly differing surface features”, explained Jörg Schmitz from imaging technology provider Stemmer Imaging. “Furthermore, the level of reflection has an important role to play, particularly on metallic materials. Strong contrasts between bright and dark or matte areas frequently prevent us from making definitive statements about the actual surface quality.”
The extra processing time can slow down an inspection line, where processes need to be as fast and cost effective as possible. When testing very small and complex objects, limitations in conventional inspection techniques result in more “pseudo scrap” passing through, meaning more defects are allowed through this phase of inspection. The manufacturer is therefore obligated to implement further manual inspections, increasing production time and costs. The imaging system needs to differentiate between complex and varying surface types and the relevant topology.
An Intelligent Solution
Multi-dimensional imaging is the most powerful technology in the field of automated quality assurance. Advanced multidimensional imaging has been integrated into inspection systems, demonstrating that it is possible to reliably detect errors to a professional standard, even when dealing with incredibly small and complex objects.
To solve this, Zorn has implemented Stemmer Imaging’s Trevista system to perform automated unit tests on the very small components that go into the fuel injection pumps.
Trevista delivers a detailed inspection of everything from highly reflective metals to matte ceramic objects and even curved surfaces.
The imaging technology can suppress brightness and differences in gloss, allowing for accurate and detailed inspection of the most diverse materials, from highly reflective metals to matte ceramic objects, and even curved surfaces. Trevista uses a patented “shape-from-shading” process that can differentiate the 3D shape of the object from its light reflection and surface shading. This allows it to close the gap between traditional 2D imaging and more advanced optical 3D shape recognition by combining the speed of 2D imaging with the precision of the advanced 3D system. The result is a cost-effective 100% inspection.
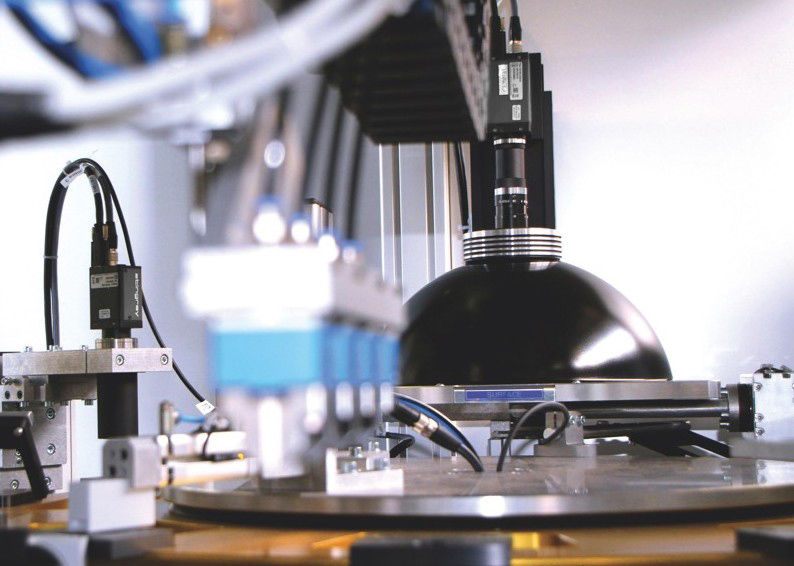
Creating a 3D Image
The key to the system is a specially-developed LED dome lighting device that can illuminate an object from four different angles while simultaneously capturing a camera image. The dome covers the object, enabling the total elimination of ambient light, another source of errors. The resulting 3D topographical images make it possible to detect defects of just a few micrometers depth.
Four different images are processed: two slope images, a curvature image and a texture image.

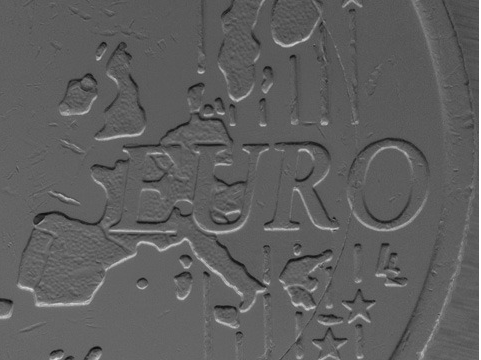
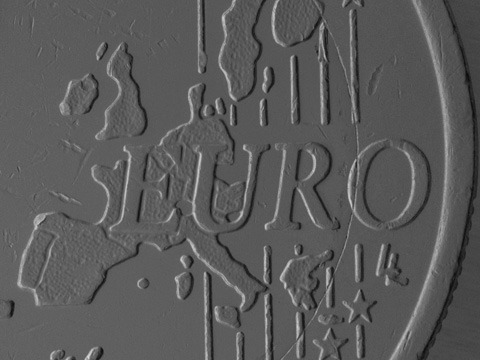

Once produced, these images are transferred to the imaging system for evaluation. . The algorithm-based calculations are made by software systems “Sherlock” from Teledyne DALSA and Common Vision Blox from Stemmer Imaging, activated by the user-friendly Xactools interface.

Looking to the Future and Reducing Scrap
The improved capabilities of advanced imaging systems like Trevista are helping to redefine quality assurance processes for manufacturers. While the latest 3D imaging technology is reaching new heights in virtually all fields of visual inspection, modern quality inspection is moving away from the traditional view of zero tolerance of any defect, down to the tiniest detail. The current shift moves away from detecting as many defects as possible, toward differentiating between critical and non-critical defects – those that affect the functionality of the object and those that do not. Therefore, focus is placed on the reliable detection of anomalies that have adverse effects on functionality, a specialty of advanced 3D imaging solutions. This process allows manufacturers to dramatically lower the volume of scrap they produce. Three-dimensional imaging technology provides the advantage of being able to cut down pseudo scrap to below two percent.
“With a conventional optical inspection, we generally assume a pseudo scrap rate of around ten percent. Practical inspection experience demonstrates that this proportion can be cut to below two percent with the Trevista method.” Thomas Erb, CEO of Xactools.
Developments in optical technology will continue to improve the manufacturing process and prevent costly and potentially dangerous situations in the future. System specialists are currently working on a Trevista variant with 4k resolution. “Technological progress will continue to set new standards in the automation of quality assurance and will therefore, last but not least, drive the competitiveness of companies forward decisively in their international markets.”


 Vision Systems – What you need to know
  Add Vision to Robots — See the Difference